

It was a breezy Sunday afternoon when I first stumbled across the idea of No-Bake Brookie Protein Balls, a delightful blend embodying the richness of my childhood and the energy I need to chase around my busy grandkids. As I rummaged through my pantry for snack inspiration, I recalled the joy of mixing flavors, much like my nonna did, pairing chocolate with nuts, sweetness with salt. A memory of our kitchen filled with laughter tied together with the promise of something rich and comforting brought the idea to life.
The mere thought of those No-Bake Brookie Protein Balls took me back, to late-night studies or early morning runs. These balls capture the very spirit of indulgence and nutrition, transforming a decadent dessert into a smart snack that won’t steer us away from our health goals. With each delightful bite, I could almost hear my family cheering me on, reminding me that food nurtures not just the body but the soul.
Flavor and Popularity
The Unique Flavor Profile of No-Bake Brookie Protein Balls
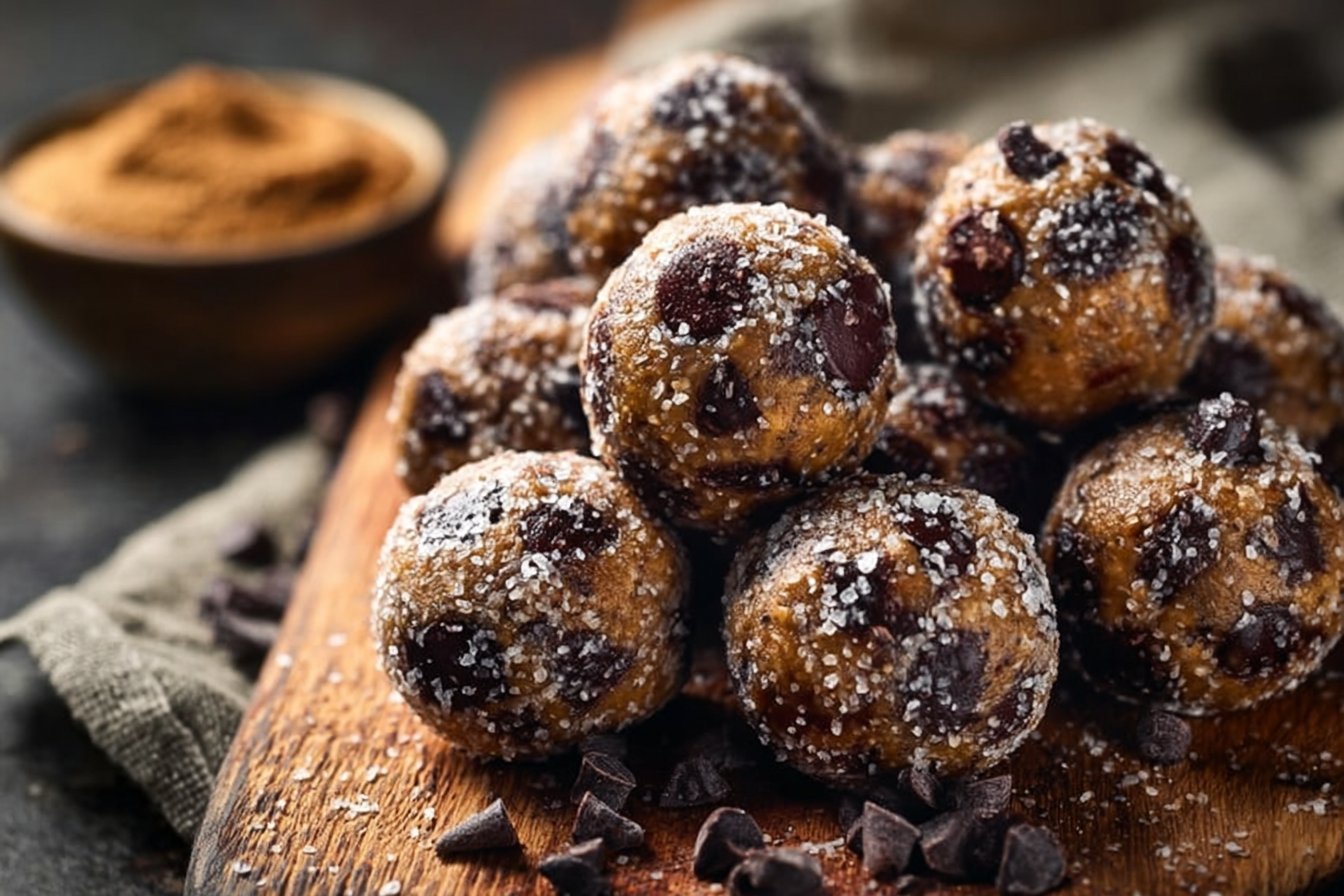
At first bite, you’re greeted with a thin layer of chocolatey goodness that melts in your mouth, mingling beautifully with chewy oatmeal and a hint of nuttiness. As the textures unfold—each chewy, creamy sphere harboring bits of dark chocolate and a sprinkle of sea salt—you realize these No-Bake Brookie Protein Balls are more than just a treat; they’re a celebration of flavor. The blend of protein powder lends a balanced essence, grounding the sweetness while offering a powerful energy boost. There’s nothing quite like the thrilling contrast of flavors and textures, where sweetness meets salty commitment to health.
Why This Recipe Is a Family Favorite and Crowd-Pleaser
Everyone has a favorite dessert they long for, and my No-Bake Brookie Protein Balls turned out to be no exception. Friends, family, even the neighborhood kids can’t resist the tempting aromas wafting through my kitchen when I whip up a batch. They serve as an invitation, calling on the laughter of shared meals and cherished moments. Whether at a picnic or an afternoon snack while the sky turns golden, these little protein-packed bites unite people.
Ingredients and Preparation
Essential Ingredients and Possible Substitutions
Creating your very own No-Bake Brookie Protein Balls doesn’t require the treasures of a five-star kitchen. Instead, you’ll find joy in simple, wholesome ingredients. Here’s your shopping list:
- Rolled Oats: The chewier, the better! Any brand will work, but choose gluten-free if necessary.
- Nut Butter: Creamy almond or classic peanut butter is delightful. Swap for sunbutter for nut allergies.
- Protein Powder: Vanilla or chocolate works wonders, and you can opt for plant-based alternatives, too.
- Honey or Maple Syrup: For a natural sweetness, either of these will bind the mix perfectly.
- Dark Chocolate Chips: Let them be as dark as your heart desires; I always lean toward 70% cocoa or more for a richer taste.
- Vanilla Extract: This simple addition complements and enhances the overall flavor.
- Pinch of Sea Salt: Salt brings it all together, balancing sweetness beautifully.
Step-by-Step Recipe Instructions with Tips
Creating these delightful No-Bake Brookie Protein Balls requires just a few simple steps, but the outcome will have your loved ones convinced you’re a culinary wizard.
- In a bowl, combine the rolled oats, protein powder, and sea salt, stirring until evenly mixed.
- In another bowl, whisk together the nut butter, honey (or maple syrup), and vanilla extract until it forms a smooth mixture.
- Gradually fold the wet ingredients into the dry mix. This may require a bit of elbow grease, but don’t shy away; it will come together beautifully.
- Gently mix in the dark chocolate chips, ensuring even distribution. Each ball deserves a sprinkle of sweetness!
- Form the mixture into small balls, roughly the size of a tablespoon. A small cookie scoop tends to make the task more manageable.
- Place the balls on a baking sheet lined with parchment paper and refrigerate for at least 30 minutes. This step solidifies their shape.
Don’t forget about experimenting! Add dried fruit, coconut, or even a dash of cinnamon for an extra kick.
Cooking Techniques and Tips
How to Cook No-Bake Brookie Protein Balls Perfectly
Though these gems are called “no-bake,” precision does matter. Be sure to pack them tightly as you shape each ball, ensuring they hold their form and develop that delectable chewy texture. Also, chill your mixture beforehand for about 15 minutes to prevent a sticky encounter during shaping; trust me, a well-prepped kitchen is always a pleasure!
Common Mistakes to Avoid
As I’ve learned from my own blunders, here are some pitfalls to watch out for. Avoid using too much liquid; it can lead to a gooey mess rather than the delightful chewy finish we want. Similarly, don’t skip the refrigeration step, as this truly solidifies their shape and flavors. Lastly, be wary of overmixing; treat it gently, as if you’re folding in memories of meals shared.
Health Benefits and Serving Suggestions
Nutritional Value of No-Bake Brookie Protein Balls
These No-Bake Brookie Protein Balls pack a nutritional punch. Bursting with fiber from the oats and healthy fats from the nut butter, they provide lasting energy to keep you on your feet. High protein content helps to support muscle repair, particularly suitable for an active lifestyle. Each ball is a mini masterpiece, offering the comfort of a dessert without sacrificing health.
Best Ways to Serve and Pair This Dish
Serve your No-Bake Brookie Protein Balls chilled, garnished with a sprinkle of extra chocolate chips or a drizzle of nut butter on top. Pair them with a tall glass of cold almond milk or a warm cup of herbal tea for an afternoon treat. They also shine as part of a healthy snack platter, inviting everyone to explore the flavors at hand.
FAQ Section
What type of mushrooms are best for No-Bake Brookie Protein Balls?
Mushrooms aren’t typically included in No-Bake Brookie Protein Balls. This recipe focuses on wholesome ingredients that are sweet and nutty, celebrating the balance of flavors through nuts and chocolate. However, if you’re looking to add earthy elements, consider integrating shredded coconut or chopped nuts.
Can I use dried garlic instead of fresh?
Dried garlic isn’t suited for this sweet recipe, as it will clash with the flavors. Stick to the harmonious sweet ingredients for this one!
How do I store leftover No-Bake Brookie Protein Balls?
These treats store beautifully! Keep them in an airtight container in the refrigerator for up to a week, or place them in a freezer-friendly bag for a month of ready-to-go snacks.
Can I freeze No-Bake Brookie Protein Balls?
Absolutely! In fact, freezing extends their shelf life. Just separate them with parchment paper in a freezer bag, and enjoy them straight from the freezer or allow them to thaw for a delightful treat.
Conclusion
If you’re like me, those late afternoons when the sun dances off the kitchen walls fill with endless possibilities of tastes and textures. No-Bake Brookie Protein Balls encapsulate that spirit. There’s something deeply comforting about embracing the art of home cooking while nourishing your loved ones with flavors that warm the heart. Trust me, you’ll want to make this again and again. Each bite whispers memories, urges connection, and inspires laughter shared around the table. So bring out your mixing bowls and let those No-Bake Brookie Protein Balls propel you into a world of flavor and health—your family will thank you!
Print
No-Bake Brookie Protein Balls
- Total Time: 45 minutes
- Yield: 12 servings 1x
- Diet: Vegetarian
Description
Delicious and nutritious No-Bake Brookie Protein Balls that combine the richness of chocolate with the chewiness of oats, perfect for a healthy snack.
Ingredients
- 2 cups rolled oats
- 1 cup nut butter (almond or peanut butter)
- 1/2 cup honey or maple syrup
- 1 cup protein powder (vanilla or chocolate)
- 1/2 cup dark chocolate chips
- 1 teaspoon vanilla extract
- Pinch of sea salt
Instructions
- In a bowl, combine the rolled oats, protein powder, and sea salt.
- In another bowl, whisk together the nut butter, honey (or maple syrup), and vanilla extract until smooth.
- Gradually fold the wet ingredients into the dry mix until well combined.
- Gently mix in the dark chocolate chips.
- Form the mixture into small balls, roughly the size of a tablespoon.
- Place the balls on a baking sheet lined with parchment paper and refrigerate for at least 30 minutes.
Notes
Experiment with add-ins like dried fruit or coconut for variety. Make sure to pack the balls tightly for the best texture.
- Prep Time: 15 minutes
- Cook Time: 30 minutes
- Category: Snack
- Method: No-Bake
- Cuisine: American
Nutrition
- Serving Size: 1 ball
- Calories: 180
- Sugar: 8g
- Sodium: 50mg
- Fat: 8g
- Saturated Fat: 1g
- Unsaturated Fat: 7g
- Trans Fat: 0g
- Carbohydrates: 22g
- Fiber: 3g
- Protein: 6g
- Cholesterol: 0mg
Keywords: snack, protein balls, no-bake, healthy dessert, oats, chocolate