

I remember the first time I made Easy Garlic Breadsticks; the aroma filled my tiny kitchen like a warm embrace. I had just returned from the bustling market, my bag heavy with fresh ingredients, and as I unwrapped the fragrant garlic I’d picked up, the memories flooded back. It was a quiet Sunday afternoon, sunlight filtering through the window, casting a soft glow over the kitchen counter.
I could almost hear my grandma’s voice guiding me through the process, reminding me about balance and flavor, just as she did when we cooked together. The dough came together effortlessly, coming alive with each knead, and when it finally emerged from the oven, golden and warm, I knew I had created something special. Those Easy Garlic Breadsticks became a staple in my kitchen: an everyday delight that never failed to evoke joy and comfort.
Flavor and Popularity
The Unique Flavor Profile of Easy Garlic Breadsticks
Easy Garlic Breadsticks offer a delightful combination of flavors that sing in harmony. Imagine biting into a warm, buttery stick, the rich flavor of garlic dancing on your palate, complemented by a hint of fresh herbs. The versatility of this dish allows you to adjust the flavors to suit your preference, making it a personalized experience with every bite. The butter provides a rich, umami base, while the garlic infuses a fragrant sweetness that captivates the senses. Finish with a sprinkle of flaky sea salt, and you have a bite that is savory, light, and utterly addictive.
The beauty of these breadsticks lies in their simplicity. You can easily elevate them by adding different ingredients, such as parmesan cheese for nutty undertones or red pepper flakes for a hint of heat. Whether served alongside a hearty bowl of pasta, soup, or just enjoyed alone, these breadsticks find a place on every table, quickly making them a favorite in your home.
Why This Recipe Is a Family Favorite and Crowd-Pleaser
Easy Garlic Breadsticks have woven their way into the fabric of family gatherings and special occasions. They are more than just a side dish; they are an invitation to share and connect. My grandchildren clamor for them during our weekend dinners, their joyful chatter filling the air as they eagerly await their favorite treat. With their aromatic promise of warmth and comfort, these breadsticks have become a staple in my cooking repertoire.
The crowd-pleasing nature of Easy Garlic Breadsticks transcends generations. Their familiar taste and irresistible aroma create a nostalgic atmosphere that takes everyone back to the heart of home cooking. Whether it’s a casual weeknight meal or a festive family gathering, these breadsticks seem to bring everyone together, creating cherished memories around the dinner table.
Ingredients and Preparation
Essential Ingredients and Possible Substitutions
The beauty of Easy Garlic Breadsticks lies in their ease of preparation and the simplicity of ingredients. For this recipe, you will need the following:
- All-purpose flour: The foundation of your dough. You can substitute with whole wheat flour for a healthier option, but this will change the texture slightly.
- Active dry yeast: This key ingredient gives the breadsticks their rise and fluffiness. If you prefer, you can use instant yeast, which does not require proofing.
- Sugars: A hint of sugar helps activate the yeast and enhances the flavor; you can replace granulated sugar with honey or agave syrup.
- Salt: Essential for seasoning the dough, balancing out the richness of the butter and garlic.
- Warm water: Makes the dough come together. Ensure the water is between 100°F and 110°F for optimal yeast activation.
- Unsalted butter: Provides richness and flavor. You can use olive oil for a lighter alternative.
- Fresh garlic: Crush it to release its oils, and if fresh isn’t available, garlic powder can be used in a pinch.
- Fresh herbs: Parsley is a classic choice, but feel free to experiment with basil or oregano.
Step-by-Step Recipe Instructions with Tips
Prepare the Yeast: In a small bowl, mix warm water and sugar, stirring gently. Sprinkle in the active dry yeast and let it sit for about 5 to 10 minutes, until bubbly and frothy. This step is crucial for ensuring your breadsticks rise beautifully.
Make the Dough: In a large mixing bowl, combine the flour and salt. Once the yeast mixture is ready, gradually add it along with melted butter. Stir until a sticky dough forms.
Knead the Dough: Transfer the dough to a floured surface and knead for about 5 to 10 minutes, until smooth and elastic. Don’t worry if the dough feels sticky; just sprinkle a little flour as needed to help with handling.
Let it Rise: Place the kneaded dough in a greased bowl, cover it with a clean kitchen towel, and let it rise in a warm place until doubled in size, about 1 hour. This is the perfect time to savor the enticing aroma of the rising dough.
Shape the Breadsticks: Once risen, punch down the dough and roll it into a log about 12 inches long. Cut it into equal pieces, about 1 inch thick. Roll each piece into a stick shape, then place them on a greased baking sheet.
Second Rise: Cover the breadsticks with a towel and let them rise for another 30 minutes.
Prepare Garlic Butter: While the breadsticks rise, melt together butter, minced garlic, and herbs of your choice in a small saucepan over low heat. The aroma will waft through your kitchen, making your mouth water.
Bake: Preheat your oven to 375°F (190°C). Brush the risen breadsticks generously with the garlic butter mixture, sprinkle with sea salt, and bake for about 15-20 minutes or until golden brown.
Serve Warm: Once out of the oven, brush with any remaining garlic butter and let your Easy Garlic Breadsticks cool slightly. Serve warm for the ultimate experience.
Cooking Techniques and Tips
How to Cook Easy Garlic Breadsticks Perfectly
The secret to cooking the perfect Easy Garlic Breadsticks is in the attention to detail. Ensure your yeast is fresh; using expired yeast can result in dense, sad breadsticks. Additionally, don’t rush the rising process; allowing the dough ample time to rise is essential for achieving the lightness and fluffiness that everyone loves.
To achieve a beautifully golden crust, bake your breadsticks on the middle rack of your oven. You can also place a small oven-safe dish filled with water at the bottom of the oven to create steam, which helps the breadsticks rise more in the oven.
Common Mistakes to Avoid
When making Easy Garlic Breadsticks, there are a few pitfalls to watch out for. Over-kneading the dough can lead to tough breadsticks instead of the desired soft, airy texture. Remember, just knead until smooth and elastic!
Also, underestimating the rise time can be tempting; don’t rush this step. Your dough needs time to develop flavor and structure. Lastly, always check your oven temperature; inaccurate readings can result in uneven baking.
Health Benefits and Serving Suggestions
Nutritional Value of Easy Garlic Breadsticks
While Easy Garlic Breadsticks are a delicious treat, they can also offer nutritional benefits, especially when made with whole ingredients. Garlic is renowned for its potential health benefits, including immune support and heart health. When paired with whole wheat flour, these breadsticks can provide additional fiber, making them a more wholesome option.
Best Ways to Serve and Pair This Dish
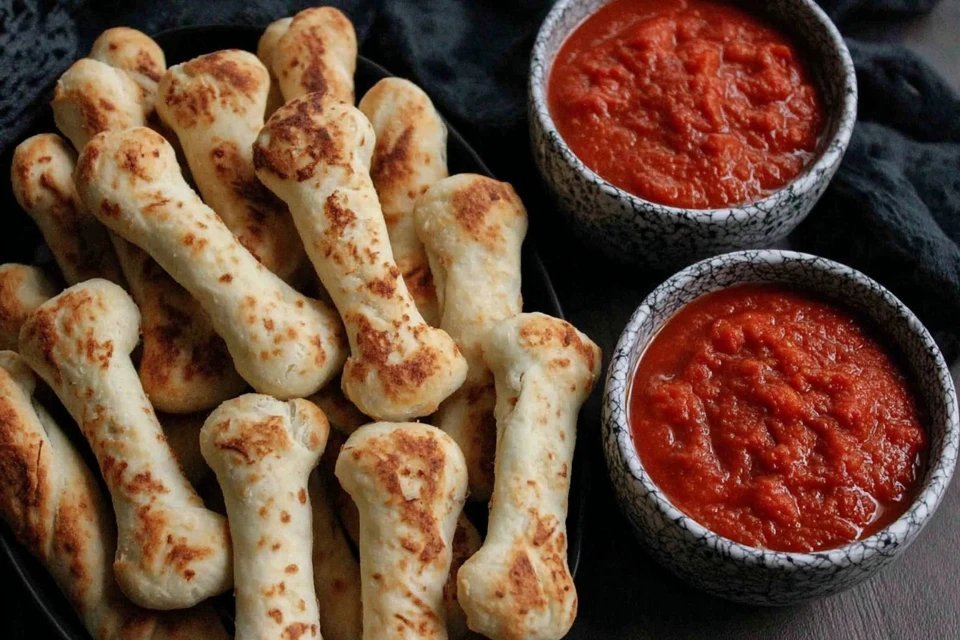
These breadsticks shine in a variety of contexts. Serve them alongside a steaming bowl of marinara sauce for dipping, or enjoy them with a fresh salad drizzled with balsamic vinaigrette. They are also a perfect accompaniment to rich, hearty soups, providing that satisfying contrast in textures.
For a special touch, you can create a breadstick basket with a colorful cloth napkin at your dinner table. Let guests help themselves, inviting them to take a moment just to enjoy the warmth and companionship that comes from sharing food.
FAQ Section
What type of mushrooms are best for Easy Garlic Breadsticks?
While mushrooms are not a typical addition to garlic breadsticks, sautéed button or cremini mushrooms can be a delicious filling if you decide to twist the traditional into a stuffed version. Just sauté them lightly, let them cool, and place a small amount within the rolled dough before baking for added flavor.
Can I use dried garlic instead of fresh?
Yes, you can use dried garlic as a substitute if fresh garlic isn’t available. A good rule of thumb is to use 1/8 teaspoon of garlic powder for every clove of fresh garlic. Keep in mind that fresh garlic offers a more vibrant flavor compared to dried.
How do I store leftover Easy Garlic Breadsticks?
Store leftover Easy Garlic Breadsticks in an airtight container at room temperature for up to 2 days. If you want to keep them longer, they can be wrapped tightly in plastic wrap and stored in the refrigerator for up to a week. Just remember, they taste best fresh.
Can I freeze Easy Garlic Breadsticks?
Yes, you can freeze these delightful breadsticks. To do so, let them cool completely, then place them in a single layer on a baking sheet until solid. Transfer the frozen breadsticks to a freezer-safe bag or container. They can be kept in the freezer for up to 3 months.
As I reflect on those delicious Easy Garlic Breadsticks I first made, I realize they are more than just a recipe; they are a vessel for connection and comfort. If you’re like me, overwhelmed by the simple pleasures in cooking, I urge you to embrace this recipe with open arms. There’s something comforting about kneading the dough, the way it transforms under your hands, and the sheer joy it brings when shared with others. Trust me, you’ll want to make this again and again. Gather your loved ones, and let your kitchen fill with warmth and laughter as you create these unforgettable Easy Garlic Breadsticks.
for more recipes follow me in pinterest
for more recipes : https://www.simplesmeals.com/classic-deviled-eggs-recipe/
Print
Easy Garlic Breadsticks
- Total Time: 75 minutes
- Yield: 12 breadsticks 1x
- Diet: Vegetarian
Description
Deliciously soft and buttery garlic breadsticks that are easy to make and perfect for sharing.
Ingredients
- 2 cups all-purpose flour (or whole wheat flour)
- 1 packet active dry yeast
- 1 tablespoon sugar (or honey/agave syrup)
- 1 teaspoon salt
- 3/4 cup warm water (between 100°F and 110°F)
- 3 tablespoons unsalted butter (melted, or olive oil)
- 3–4 cloves fresh garlic (minced, or garlic powder)
- Fresh herbs (parsley, basil, or oregano)
- Flaky sea salt (for sprinkling)
Instructions
- Prepare the Yeast: In a small bowl, mix warm water and sugar, sprinkle in the active dry yeast and let it sit for 5 to 10 minutes until bubbly.
- Make the Dough: In a large bowl, combine flour and salt. Add the yeast mixture and melted butter, stir until a sticky dough forms.
- Knead the Dough: Transfer to a floured surface and knead for 5 to 10 minutes until smooth and elastic.
- Let it Rise: Place in a greased bowl, cover with a towel, and let rise for about 1 hour until doubled in size.
- Shape the Breadsticks: Punch down the dough, roll into a log, cut into equal pieces, and shape into sticks. Place on a greased baking sheet.
- Second Rise: Cover with a towel and let rise for another 30 minutes.
- Prepare Garlic Butter: Melt butter, minced garlic, and herbs together in a small saucepan.
- Bake: Preheat oven to 375°F (190°C). Brush the risen breadsticks with garlic butter, sprinkle with sea salt, and bake for 15-20 minutes until golden brown.
- Serve Warm: Brush with remaining garlic butter after baking and serve warm.
Notes
Ensure your yeast is fresh and don’t rush the dough rising process for the best texture.
- Prep Time: 15 minutes
- Cook Time: 20 minutes
- Category: Side Dish
- Method: Baking
- Cuisine: Italian
Nutrition
- Serving Size: 1 breadstick
- Calories: 150
- Sugar: 1g
- Sodium: 200mg
- Fat: 7g
- Saturated Fat: 4g
- Unsaturated Fat: 3g
- Trans Fat: 0g
- Carbohydrates: 18g
- Fiber: 1g
- Protein: 3g
- Cholesterol: 15mg
Keywords: garlic breadsticks, bread, easy recipe, vegetarian, side dish